How to achieve enterprise-grade attack-surface monitoring with open source software
Set up your very own in-depth EASM platform complete with screenshots, continuous monitoring and an API leveraging open-source software.
Attack surface monitoring has become increasingly important and popular in recent years as the internet footprint of organizations has increased. Hackers are utilizing advanced recon methods for discovering and monitoring internet-facing assets of an organisation. As changes occur in the attack surface, it is beneficial for hackers to be notified so that they can immediately check if these changes may have introduced security issues. Of course, this makes it equally important for organisations to monitor their own attack surface, so that they have at least the same visibility as their attackers.
Today there are a lot of tools available to help automate the process of monitoring an attack surface. Many of them are extremely expensive, and designed to be used in an enterprise setting. Thankfully for individual users, OSINT hobbyists and bug bounty hunters, there are some great free, open source alternatives too. Today I’ll be diving into one of them, SpiderFoot.
The open source version of SpiderFoot is pretty amazing, and totally free. It’s been worked on for almost a decade now making it very stable and feature rich. If you want a full range of attack surface monitoring capabilities, you’d need to use SpiderFoot HX, the premium paid offering that’s cloud-hosted. If you don’t want to do this stuff from the cloud, or are operating on a tight budget, I’m going to cover some simple things you can do using the open source version plus some other tools and scripts to get some basic attack surface monitoring capabilities. This will enable you to:
- Be notified when new hosts appear in certificate transparency, SHODAN and other places that SpiderFoot hooks into to identify new hosts
- Capture screenshots of new hosts as they are identified
- The rest is up to your imagination – if SpiderFoot detects it, you can get alerted about it
First of all, let’s choose the SpiderFoot HX features we need to mimic to get this functionality. Out of the main SpiderFoot HX features beyond the open source version, those highlighted in bold look like good candidates because they offer a lot of value and also seem achievable:
- Hosted, pre-installed and pre-configured
- Better performance (5x-10x)
- Team collaboration
- Multiple targets per scan
- Monitoring with change detection and notifications
- Correlations
- Investigations through a graph-based UI
- Customer Support
- Built-in TOR integration
- Feed data to Splunk, ElasticSearch and REST endpoints
- API
- Screenshotting
API
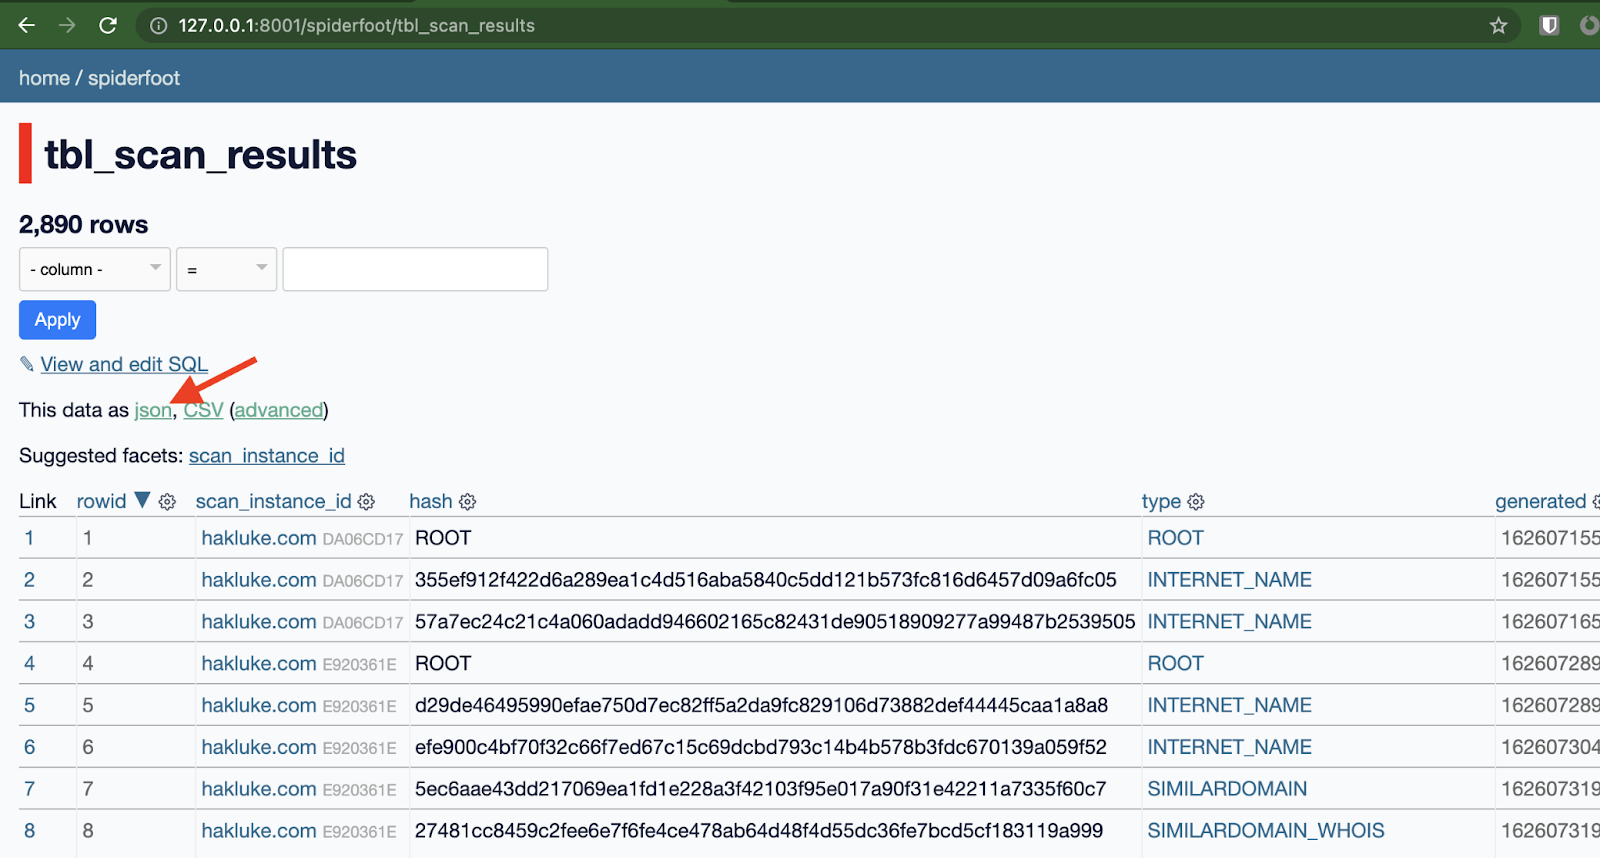
Perhaps surprisingly, this one is very easy to implement. The open source SpiderFoot uses SQLite3 as the backend database. If you have run a scan, you can view the raw results in the database easily by simply opening the spiderfoot.db file in the root directory of the SpiderFoot installation.
There is an excellent open source project called Datasette which ingests any SQLite file and turns it into a browsable web interface, along with a full JSON API. It also has some other handy features like the ability to run raw SQL queries and export data in CSV format. A word of warning, Datasette does not have any authentication and it allows anyone who visits the page the ability to run arbitrary SQL commands and view all of your data, so be sure not to expose this beyond localhost!
In order to set this up we can simply install Datasette with pip (requires Python3.6 or higher):
pip install datasette
If you’re using a Mac, you may also use Homebrew:
brew install datasette
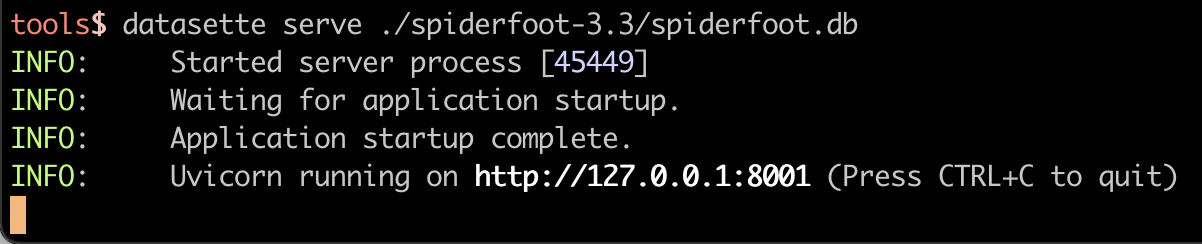
Then we can start datasette with the following command. You may need to change the location of the database, depending on where it’s stored on your system.
datasette serve ./spiderfoot.db
You should see something similar to the following:

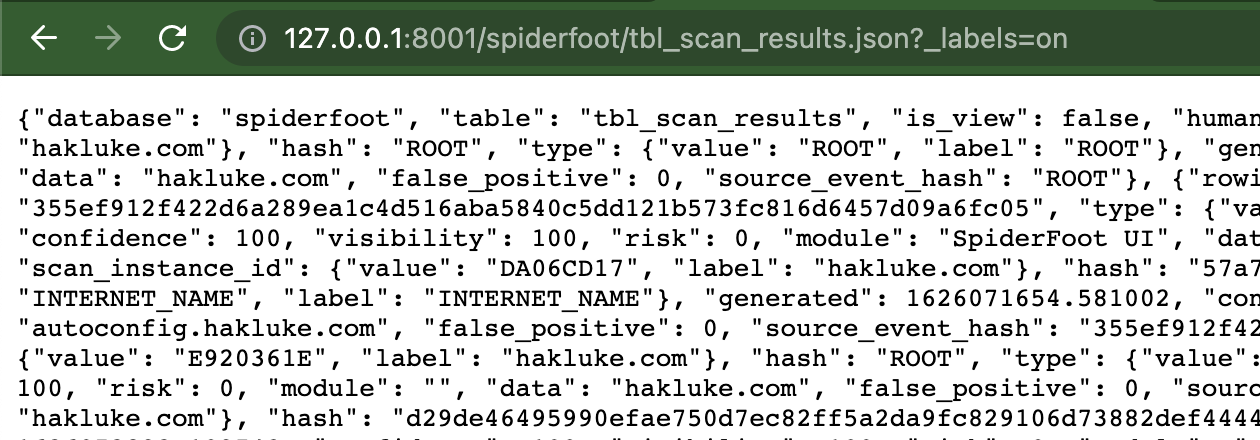
http://127.0.0.1:8001/spiderfoot/tbl_scan_results.json?_labels=on&module=sfp_whois

Screenshotting
There are many different open source command-line utilities for screenshotting HTTP responses of hosts but my favourite is probably Aquatone by michenriksen.
First, we need a list of hosts to screenshot. Luckily we have set up our own API, so this is trivial with the following command:
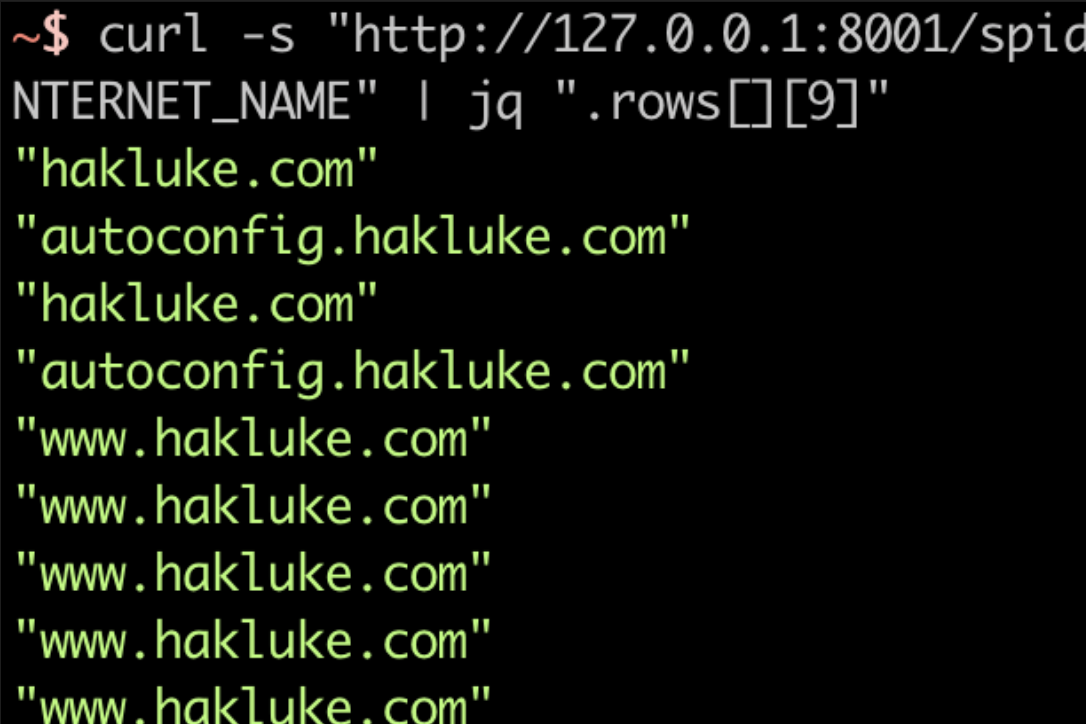
curl -s "http://127.0.0.1:8001/spiderfoot/tbl_scan_results.json?_sort=rowid&type__exact=INTERNET_NAME" | jq ".rows[][9]"
The curl command queries the API and returns the JSON response, then jq is used to extract just the hostnames. The output should look something like this:

The final command to extract all raw, unique hostnames from SpiderFoot looks like this:
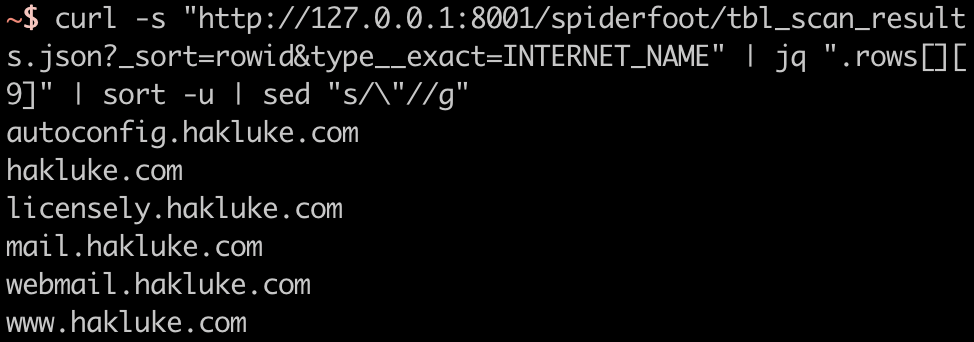
curl -s "http://127.0.0.1:8001/spiderfoot/tbl_scan_results.json?_sort=rowid&type__exact=INTERNET_NAME" | jq ".rows[][9]" | sort -u | sed "s/\"//g"
And the output:
Now head over to the Aquatone releases page to grab the latest version for your operating system, download and unzip it. Inside you will find a binary file.
The screenshot functionality utilises headless Chromium or Chrome. The Aquatone docs say that Chrome is sometimes unstable, so they recommend installing Chromium, which you can find here.
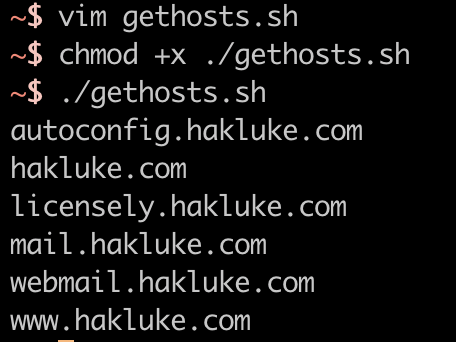
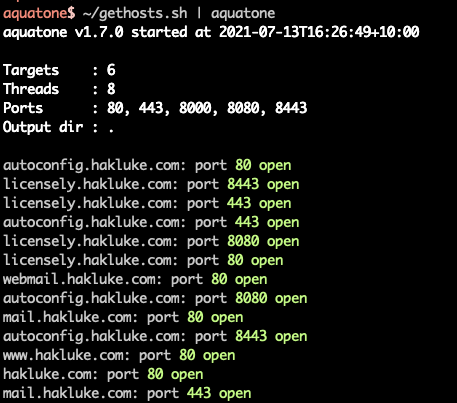
Once it’s installed, all we need to do is pipe the output of gethosts.sh into aquatone like this:
~/gethosts.sh | aquatone
I’d recommend doing this in an empty directory, because it will create a bunch of files and folders.
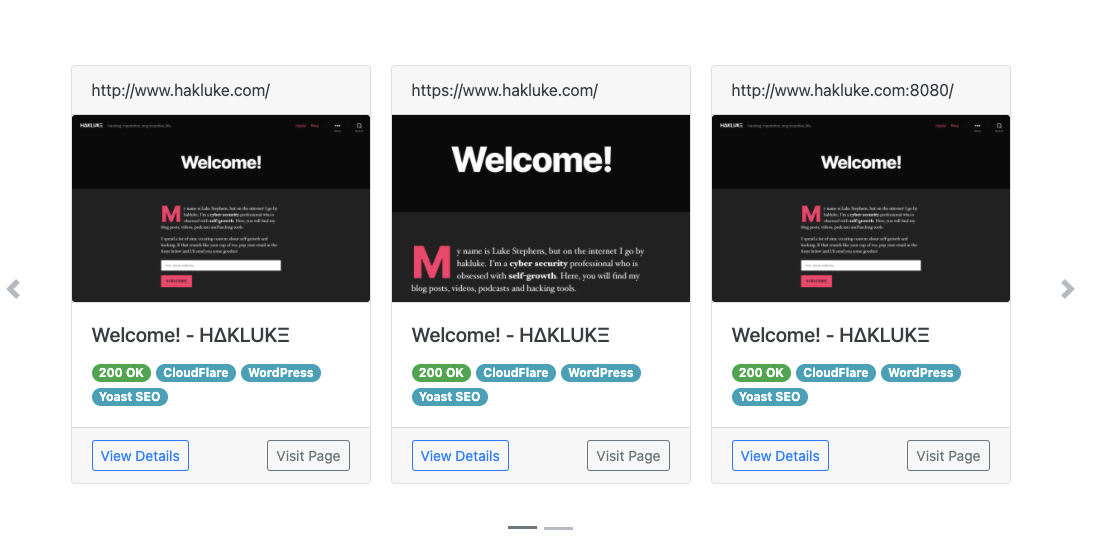
The output should look similar to the following:
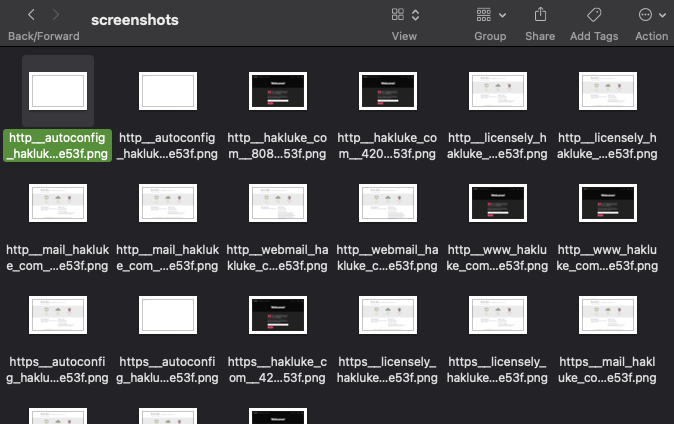
When aquatone finishes, it will have created a number of files in your current directory, as shown below.

If you take a look in the screenshots directory, you can view the raw screenshots:
 Monitoring With Change Detection and Notifications
As is, the open source version of SpiderFoot provides single scans, but no means of continuously monitoring a target by scanning at regular intervals. This is something only offered by SpiderFoot HX. Ideally, if we’re hacking a target or defending our own organisation, we would want scans to be performed at least once per day, and any changes should be sent to us as a notification.
SpiderFoot is quite a comprehensive application that pulls many different data types. Alerting on all of these data types may lead to a lot of notifications, so for the purpose of this blog post we are just going to monitor for newly discovered subdomain names. This would be very useful to a bug bounty hunter for monitoring a large scope, or to a security team monitoring their own systems. Note that you could use any data gathered by SpiderFoot with similar methods.
Setting Up Continuous Scanning Using Cronjobs
First let’s set up regular scans by utilising a cronjob! To start, simply run:
crontab -e
This will open up the file which will contain all of your cronjobs in vim. If you know how to use vim, simply enter the following line, then save and quit. You will need to edit the location of sf.py based on your setup, and also change “yourtarget.com” to whatever your scan target will be.
0 2 * * * ~/tools/spiderfoot/sf.py -s yourtarget.com
If you aren’t sure how to use vim, follow these instructions very carefully.
- Once you have run crontab -e, press i to enter insert mode
- Type the following, changing the sf.py location and target to suit your setup/needs:
0 2 * * * ~/tools/spiderfoot/sf.py -s yourtarget.com
- Press the escape key
- Type :wq
- Press enter
The “0 2 * * *” tells cron to run the command every day at 2am. To better understand how cron scheduling works or create your own, check out crontab.guru.
That’s it! Now that you’ve edited your crontab, the scan will run every day at 2am.
Change Detection
As I stated earlier, for the scope of this blog, we’re only interested in sending notifications for new subdomains, so we can reuse the gethosts.sh script that we created earlier.
Firstly, let’s create another bash script to append new hosts to a file. Save this script to a file called appendhosts.sh:
touch ~/hosts.txt
for line in `~/gethosts.sh`; do grep -qxF $line ~/hosts.txt || echo $line >> ~/hosts.txt; done
Be sure to give it execute permissions with chmod +x ~/appendhosts.sh
Next, run crontab -e and add this new line to make the script run every hour.
0 * * * * ~/appendhosts.sh
Now, any time a new subdomain is discovered, it will be added to the end of the ~/hosts.txt file. Just one step left, setting up notifications!
Setting up Notifications
The last step is setting up notifications for the changes we detected in the previous step. Again, we can do this with some bash magic and a cronjob. I’m going to be using a Discord webhook for the notifications. Essentially, we can send a message using curl to our own Discord webhook, and it will send through as a Discord message.
To set up your Discord webhook URL, follow the instructions here. Save the webhook URL for later.
Now copy the following script into ~/sendnotification.sh and edit the example webhook to be your own.
tail -n 5 -f ~/hosts.txt | grep --line-buffered '.*' | while read line;

do

   curl -H "Content-Type: application/json" -d "{\"username\": \"SpiderFoot\", \"content\": \"$line\"}" "https://discord.com/api/webhooks/1234567890/ABCDEFG1234567";

done
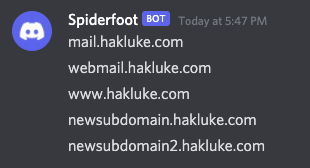
This script will continuously monitor ~/hosts.txt for changes. Whenever a new subdomain is appended, it will send that subdomain as a Discord message. Once again, be sure to make the script executable with:
chmod +x ~/sendnotification.sh
As this script will need to run continuously, it may be best to run it within tmux or screen on a VPS so that if your SSH connection drops, it will continue to work.
Here’s a screenshot of the outcome:
Conclusion
The point of this article is to show that even the free version of SpiderFoot is an extremely powerful tool and can be easily extended to provide some basic attack surface monitoring capabilities. By implementing some simple scripts around it, a few of the key features of SpiderFoot HX can be mimicked free of charge. This might be ideal for individual users, bug bounty hunters and OSINT hobbyists.
If you do OSINT a lot or you’re using this as an organisation, you may be better off paying for SpiderFoot HX for the additional speed, support, hosting, multiple targets, correlations, etc.
Happy OSINTing!